Elite RV Pros logo - Dallas-Fort Worth RV Repair Services
Blog

Spray-On Roof Replacement For RVs

November 1, 2022

RV owners know there’s always something to fix or something to update when it comes to keeping your RV looking its best on the outside and feeling its best on the inside. What could be better than the guarantee that your RV’s roof will be safe from damage from now on?

Thanks to the technology of spray-on roof applications, this is now not only possible, but the best option to care for your RV’s roof as well!

Preparing The Surface For Application

The essential first step of preparing your RV for a spray-on roof application is to prepare the surface. This ensures the longevity and effectiveness of the new roofing material, guaranteeing that it will stand the test of time. Here are the steps you should take to make sure your RV’s roof is ready to go before application:

  • Thoroughly clean the surface of the RV roof,
  • Remove any dirt, debris, or previous roofing materials
  • Repair and smooth out any cracks, holes, or other damage on the surface
  • Prime the surface with the appropriate primer

This cleaning can be done with a pressure washer or a cleaning solution specifically designed for RV roofs. Taking these steps ensures a clean starting point for the application process and provides a strong bond between the surface and the new material which will help to prevent any leaks or water damage in the future.

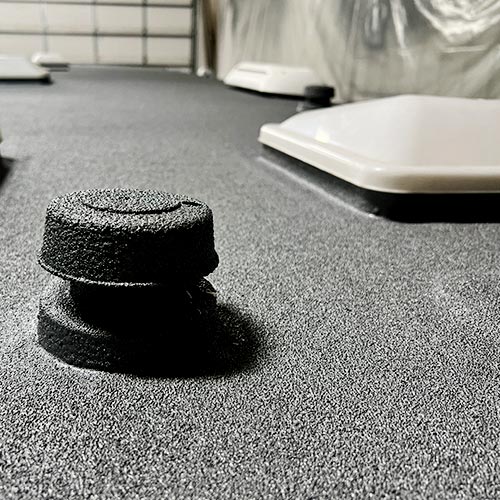
closeup of freshly applied rv spray on roof

Applying The Spray-On Material

Applying the spray-on roofing material is not terribly technical on its own. The part of the process that requires the most thought and intention is the preparation steps you take before it’s time to apply the spray-on material. Once your surface has been properly prepared according to the manufacturer’s directions, you can get to work applying the spray-on application itself. You should opt for a spray on roof material that is designed for easy application and long-lasting durability like the Rhino Eco-Coat roof lining system.

To get started, mix the material according to the manufacturer’s instructions, making sure to use the appropriate ratio of material to hardener. Using a spray gun or roller, apply the material in thin, even coats. It is important that you work in small sections at a time and to overlap each pass slightly to ensure full coverage. After the first coat is applied, it should be allowed to dry for the manufacturer’s recommended amount of time before applying additional coats.

Maintaining And Inspecting The Spray-On Roof

Maintaining and inspecting your RV’s new spray-on roof is important to ensure its longevity and effectiveness. Regular cleaning and inspection can help to prevent leaks, cracking, and other damage that can shorten the life of the roof. Keep your eye open for any signs of wear, tear or damage to make sure your new roof stays in tip-top shape.

You should periodically clean the new roof, depending on the environment you live in and how often you use your RV. To make a homemade solution, mix a mild detergent with water to clean the roof, or use a specialized cleaner specifically designed for spray on roofing materials. Never use harsh chemicals or abrasive materials which could damage the spray-on material.

Spray-On Roof Application Near You

If your RV is due for a roof update or has damage that has been left unattended, this is the perfect time to get your RV’s roof taken care of before the traveling season is back upon you. At Elite RV Roof and Collision, our team specializes in RV spray-on roof replacements utilizing Rhino-Eco Coat, and we would love to give you an RV roof that you never have to worry about again. Call us at 682-802-9619 to schedule your free inspection so we can get your roof looking and acting as good as new!

Book an Appointment Now!
crosschevron-down